

1. Create the Open API integration
1
Open Integrations
In the top menu, open Integrations and click Create Integration. Choose Open API.
2
Fill in the form
Webhook URL is optional. If you set it, it must be HTTPS, and Cubbo sends a test 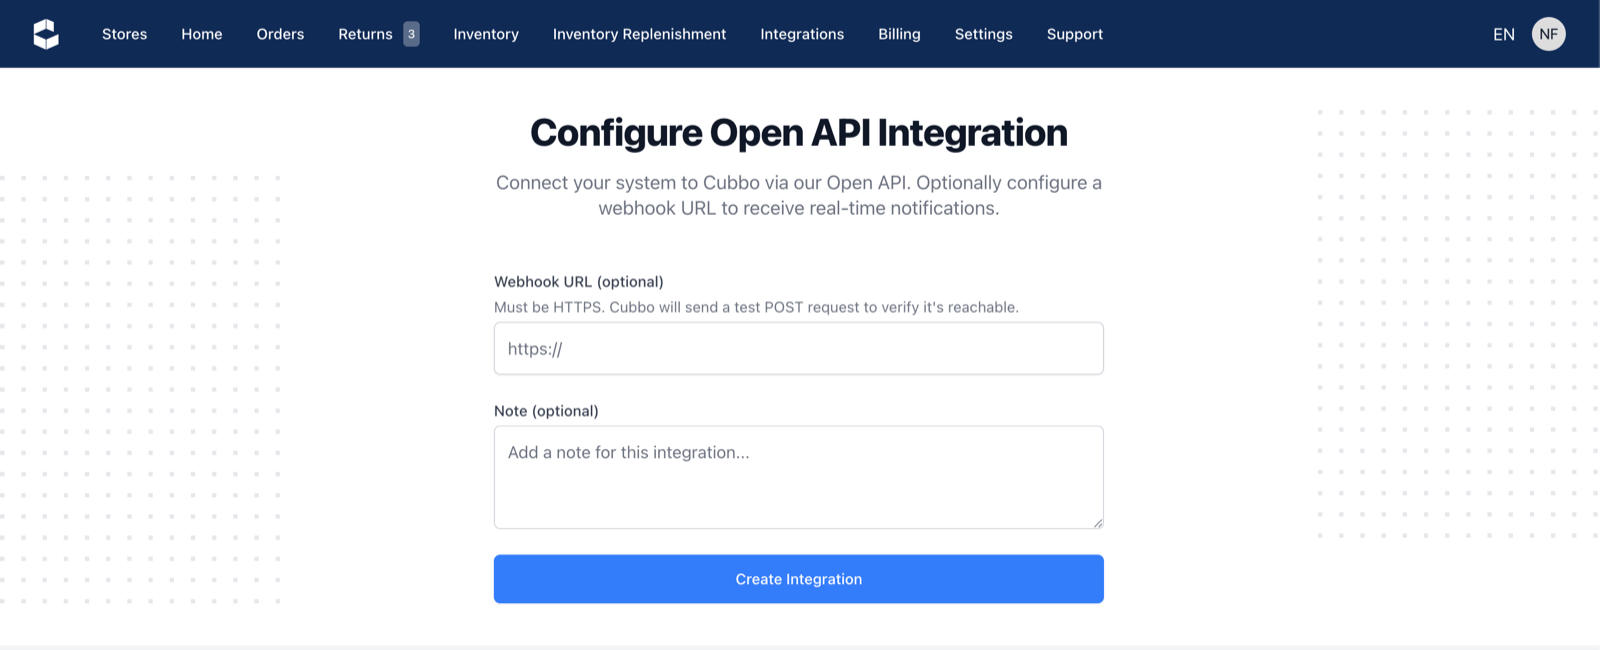
POST to check that it
answers. Note is an optional label for your team. Click Create Integration.3
Save your credentials
The app shows your 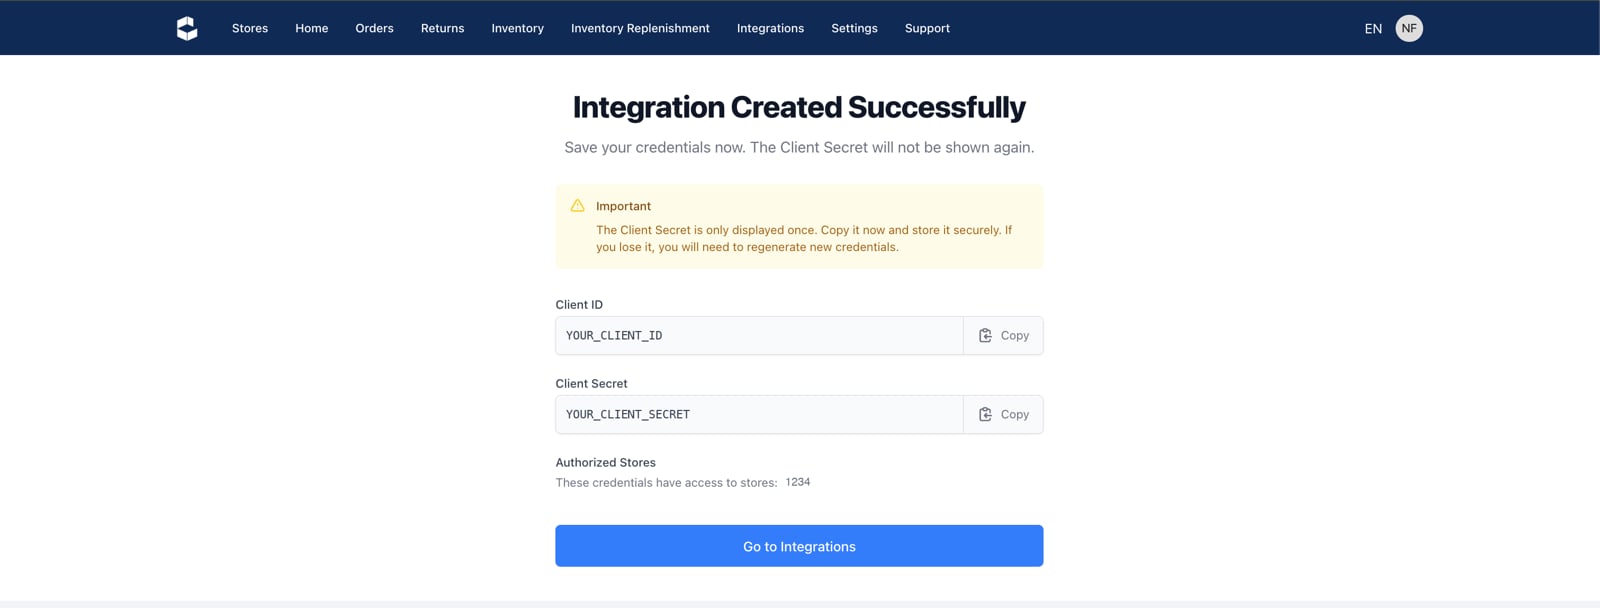
client_id and client_secret. Copy both now and store them securely.store_id: the value you send in
store_id on orders, products, inventory and the other store endpoints. If more than one store is listed,
the same credentials work for all of them; change store_id to choose the store.POST /v1/auth/token. See Authentication.
2. Manage the integration
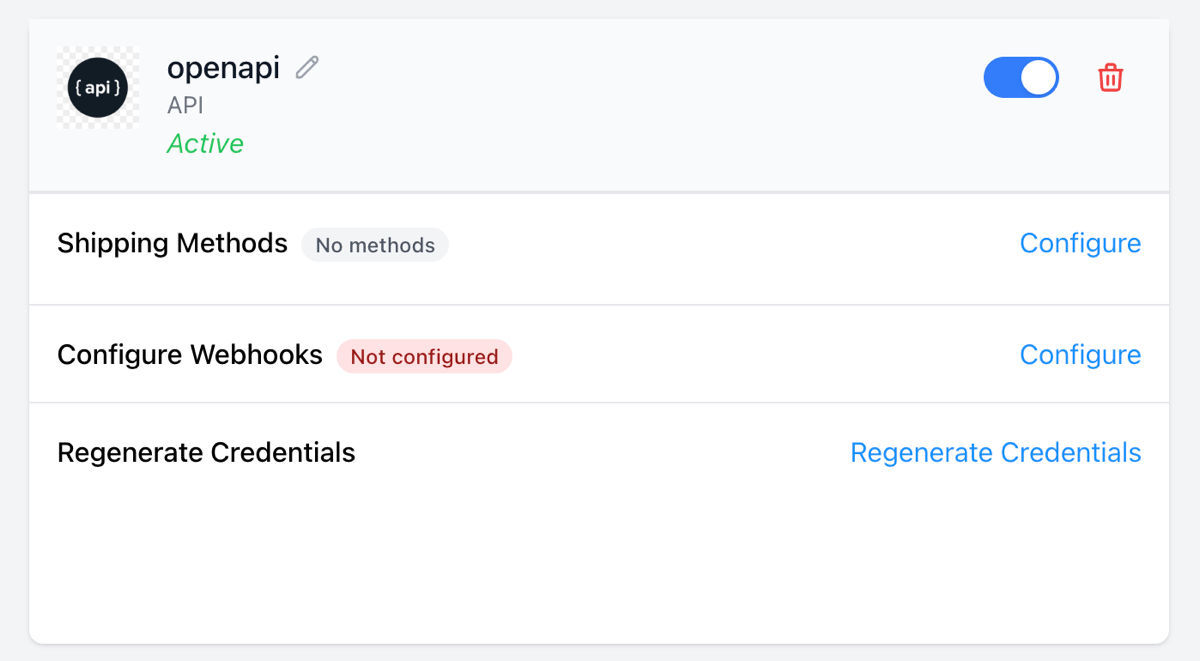
Your Open API integration appears in Integrations as a card. From it you can:- Activate or deactivate the integration with the toggle. While it is deactivated, Cubbo does not process any creation or update coming from it.
- Open Shipping Methods to map your shipping methods. The badge says whether they are configured.
- Open Configure Webhooks to set where Cubbo sends events. The badge says whether webhooks are configured or failing.
- Regenerate Credentials when a secret is lost or exposed. The current credentials stop working immediately.
3. Configure shipping methods
Each order you create must say how it ships. You do that withshipping_line_code in POST /v1/orders: its value
is the name of a shipping method of your integration. Cubbo then picks the carrier with the shipping configuration
assigned to that method.
1
Create a shipping configuration
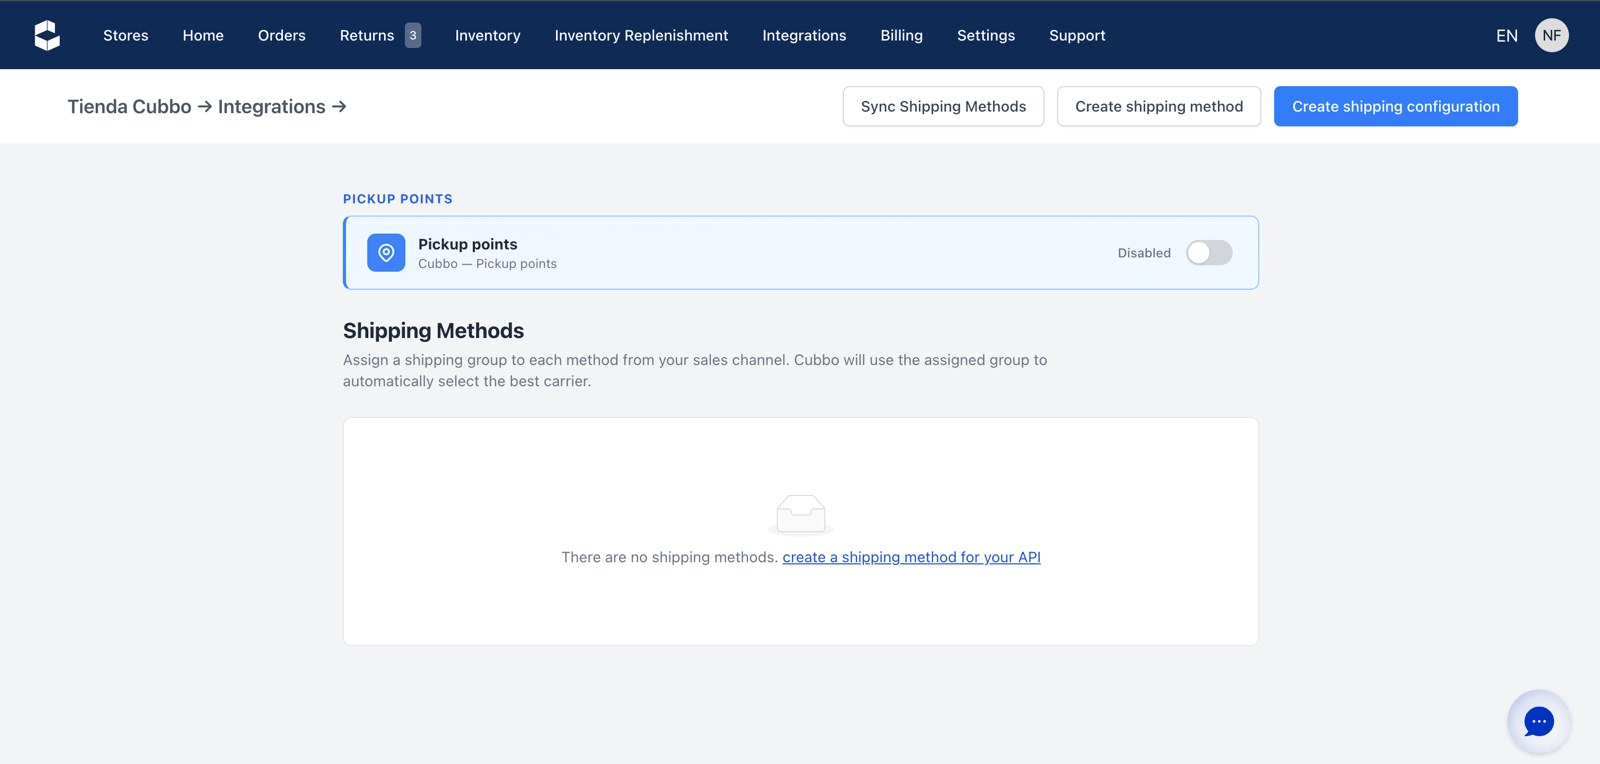
Click Create shipping configuration and fill in: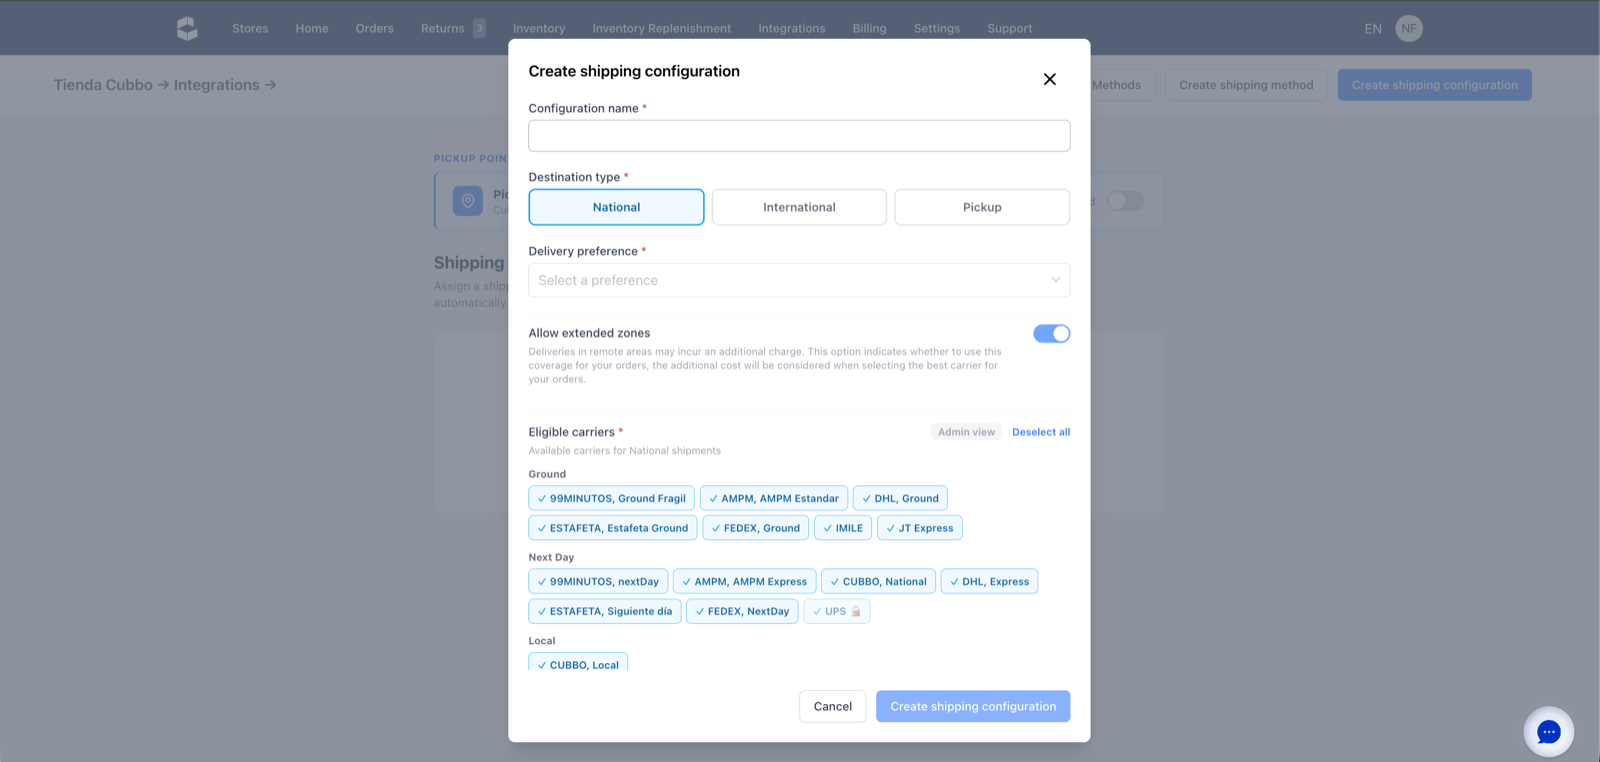
- Configuration name.
- Destination type: National, International or Pickup.
- Delivery preference: best price picks the cheapest carrier; best service picks the fastest delivery at the best price.
- Allow extended zones: whether to ship to remote areas that may carry an extra charge. The extra cost is considered when Cubbo selects the carrier.
- Eligible carriers: the carriers this configuration may use, grouped by service level.
2
Add your shipping methods
Click Create shipping method. In Integration Delivery Method, type the exact name you will send as
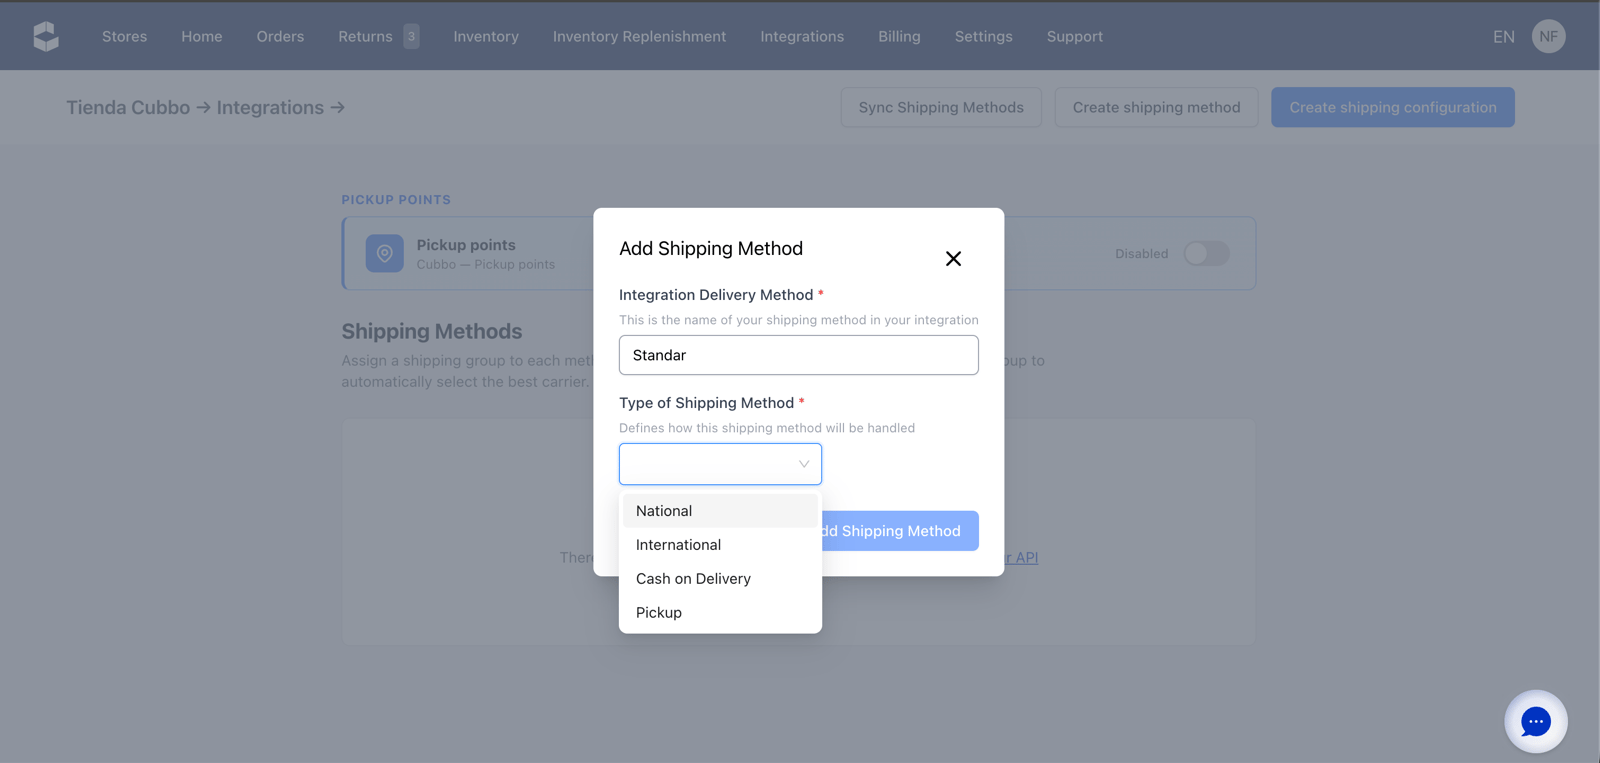
shipping_line_code, for example standard or express. Your orders must send exactly this name: it is
case-sensitive and spaces count, so Express and express are different methods. Pick its
Type of Shipping Method:3
Assign a configuration to each method
In the shipping methods list, assign one of your shipping configurations to each method. Cubbo uses it to
select the best carrier automatically.
4. Configure webhooks
Click Configure Webhooks on the integration card. Turn on each webhook you need and enter its URL: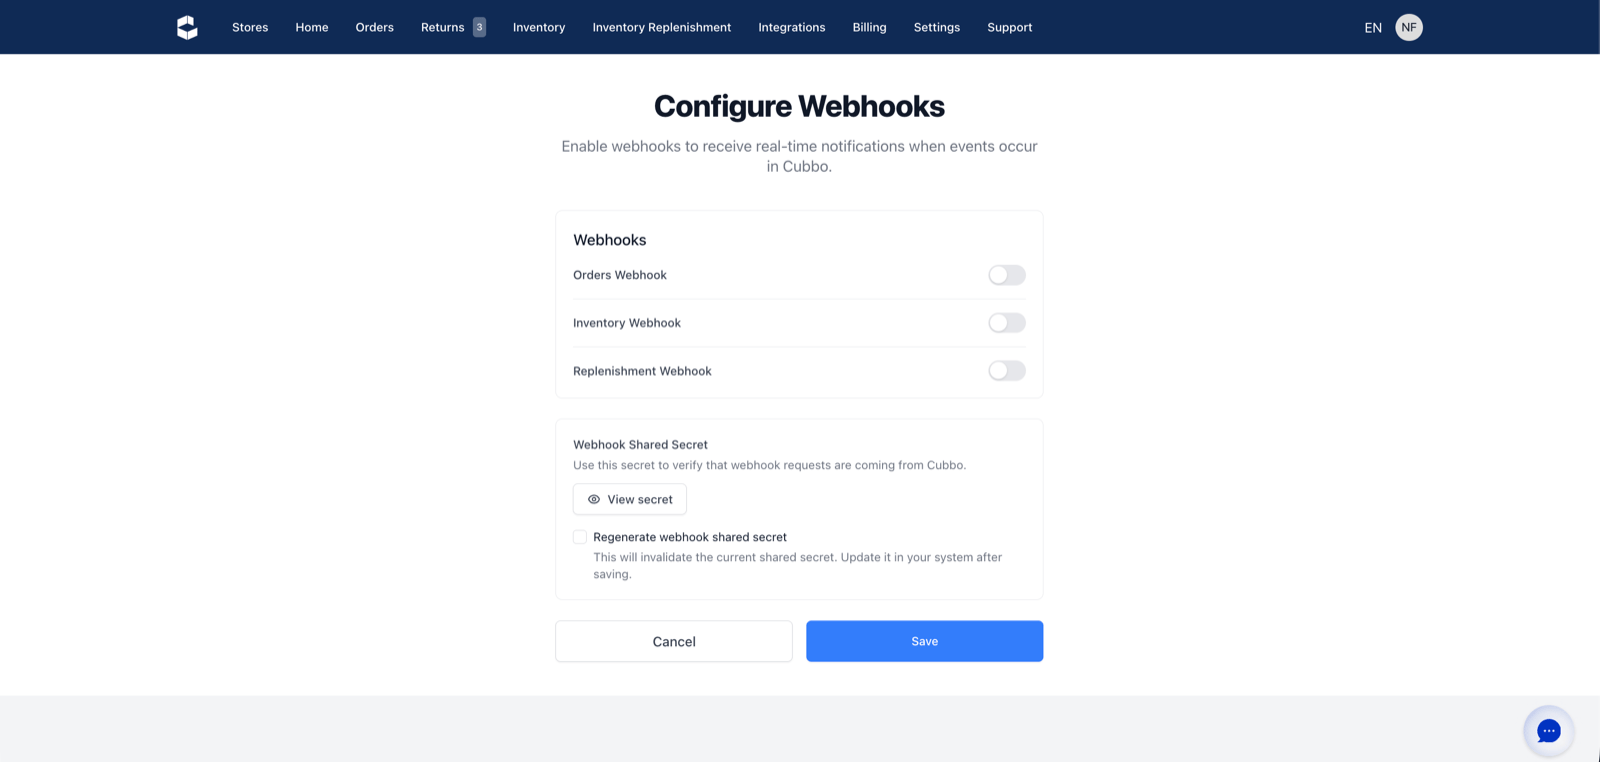
- Custom Headers adds static headers to every webhook request, for example an API key for your endpoint.
- Test sends a test request. It passes when your URL answers
200. - Webhook Shared Secret is the key to verify the signature. Click View secret to copy it.
- Regenerate webhook shared secret invalidates the current secret. Update it in your system after saving.
5. Move to production
When all your tests in the test store are complete, ask your account manager to activate your production account. Repeat these steps there: you get new credentials and a newstore_id, and you configure shipping methods and
webhooks again. Then switch the credentials and store_id in your integration to start operating.